Migrate wordpress website to new domain can feel like a big step, but when broken down, it becomes something any beginner can follow. Moving your website means taking everything you built on your old web address and placing it safely on a new one. If done carefully, your site will still work the same, and people who find you through search engines will still reach your pages. In the next few paragraphs, we’ll go through the first part of this process in a simple and clear way.
When people decide to move a WordPress site to a new domain, they usually have a reason. Maybe the old name doesn’t match their brand anymore, or they found a more meaningful domain that fits their business better. Sometimes, they want a name that is easier to remember or that sounds more professional. Other times, they are switching web hosts and want the domain change at the same time. Whatever the reason, the important part is taking your site with you without breaking links or losing visitors.
Before you begin moving your website, it’s good to understand the risks. If the switch isn’t done right, people might see error pages when they try to visit your site. Search engines like Google might also stop showing your pages in results for a while, which can hurt your traffic. That is why careful planning is so important before making the domain change.
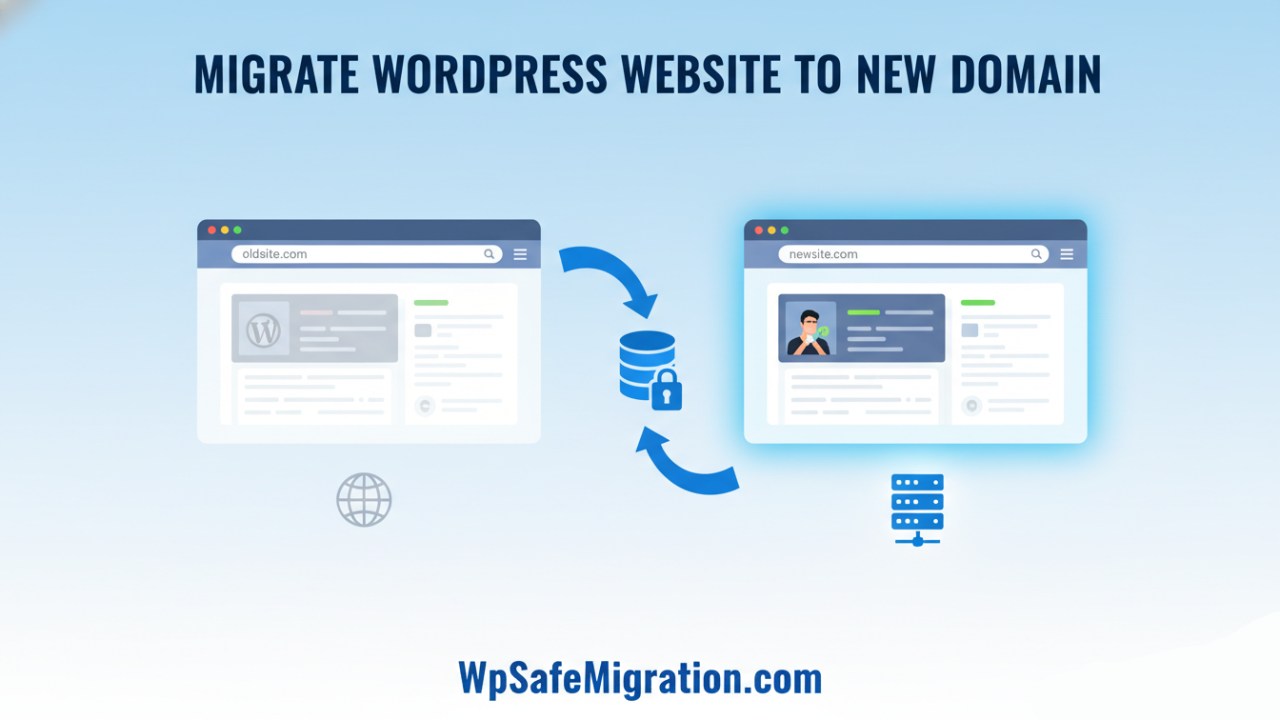
The first step in your journey is to prepare your site for the move. Every part of your WordPress site—your pictures, posts, pages, themes, and settings—lives in two places: your site’s files and its database. The files are everything that makes your website look and behave the way it does, while the database holds all the text and settings behind the scenes. Creating a full backup ensures you have a safe copy of everything, so nothing is lost if something goes wrong during the process.
Once your backup is safely stored on your computer or cloud storage, the next step is to move your files and database to your new domain. This can be done in different ways. Some hosts provide a one-click tool that copies everything automatically, which is the easiest choice for most beginners. If your host doesn’t offer that, you can download all your website files using a tool like FTP and then upload them to the new domain. After that, you will export your database and import it into a new database on the new domain.
After you have copied your files and database, you must tell WordPress where it now lives. This means updating the site’s URL in your database and sometimes within WordPress settings. Changing this makes sure that when someone visits your new domain, your site appears the way it should. If you skip this part, your site might still try to load using the old address, which will cause confusion and broken links.
At this point, your site is starting to feel at home on its new domain, but a few more steps are needed before people and search engines fully recognize the change. Stay tuned for the second half of this guide, where we will talk about keeping your visitors happy, fixing links, and helping search engines like Google understand your new home. You can also find helpful tips in this guide on internal links/SEO practices to make sure your site keeps strong visitor traffic.
301 Redirects After You Migrate WordPress Website to New Domain
Once your WordPress site is on the new domain and all the content is present, the next important step is to make sure people and search engines still reach it. When someone tries to open a page from your old web address, you want them to be sent automatically to the same page on the new domain. This is done with something called a 301 redirect, which tells web browsers and search engines that the page has moved permanently. This helps keep most of your site’s search engine value as people move from old links to the new ones.
When setting up redirects, the goal is to match every old page with its correct new counterpart. For example, if someone had a page like olddomain.com/services, it should lead to newdomain.com/services instead of just the homepage. This one-to-one matching lets visitors land exactly where they expect and helps search engines understand your site’s structure. Avoid sending all old pages to the homepage, because that confuses both users and search bots.
You can add these redirects in different ways. Some hosting services let you add a rule that sends all traffic from the old domain straight to the new one. If your host supports Apache servers, you can put simple redirect rules into a file called .htaccess. Many WordPress plugins can do this too. The key is to make sure all old links are handled, so nobody sees “page not found” errors.
Tell Google About the Domain Change
Search engines like Google don’t assume a site has moved just because you set up redirects. You should let them know directly that your whole website now lives at a new address. Google has a feature called “Change of Address” inside Google Search Console that lets you do just that.
To use this tool, you must first add both your old and new domains to Search Console. Once both are verified, you can choose your old domain and tell Google which new domain it should point to. This helps Google switch its records and start showing your new website in search results instead of the old one. It can take a little time for the change to fully take effect, so be patient and check back occasionally to see how things are progressing.
After you’ve submitted the change, also send Google a fresh sitemap that lists all your new website pages. A sitemap is a simple list of all the important URLs on your site. By submitting it, you help Google find and index your content faster. Meanwhile, make sure your old domain stays active at least for a while, so redirects keep working and search engines don’t forget the connection between the two domains.
Fixing Links and Finding Broken Pages
After moving everything and setting up redirects, take some time to check your new site for broken links or missing images. Sometimes a link inside a page still points to the old domain by mistake, and when clicked, users may be sent to a redirect or a 404 error. You can use a simple website scanner tool to crawl your site and find these issues. Then you can update them so they point straight to the new domain links, which makes your site faster and easier to browse.
Updating internal links by hand might sound like a lot of work, but it improves your site’s user experience. It also means visitors and search bots won’t need to follow many redirects before reaching the right page. This little housekeeping step can make your site feel smoother and help preserve your search rankings as you fully settle into your new domain.
Watch and Learn After the Move
Even after you finish all the technical work, your job isn’t completely over. For the next few weeks and months, you should watch how your site is performing. Check Google Search Console for messages about crawl errors or pages that aren’t indexed. Look at your traffic and rankings to make sure everything is moving in the right direction. It’s normal for search results to wobble a bit right after a domain change, but if things stay low for too long, it might be a sign that something needs fixing.
This careful watch keeps you ahead of problems before they become big ones. For more tips on keeping your site healthy after a big change, check out our earlier section on internal links and SEO basics. Small steps like updating your navigation menus or checking image links can have a big impact on how well your site works and how easily visitors find what they need.