When you migrate WordPress site to new server, you are moving all your website files, pictures, posts, and everything that makes your site work from one place (your old host) to another (your new host). This is often done when the old host is slow, expensive, or not giving the support you need. A good move can make your site faster and easier to manage, but if you don’t prepare well, things can go wrong. That’s why it’s important to follow each step in this guide carefully.
What Is WordPress Migration?
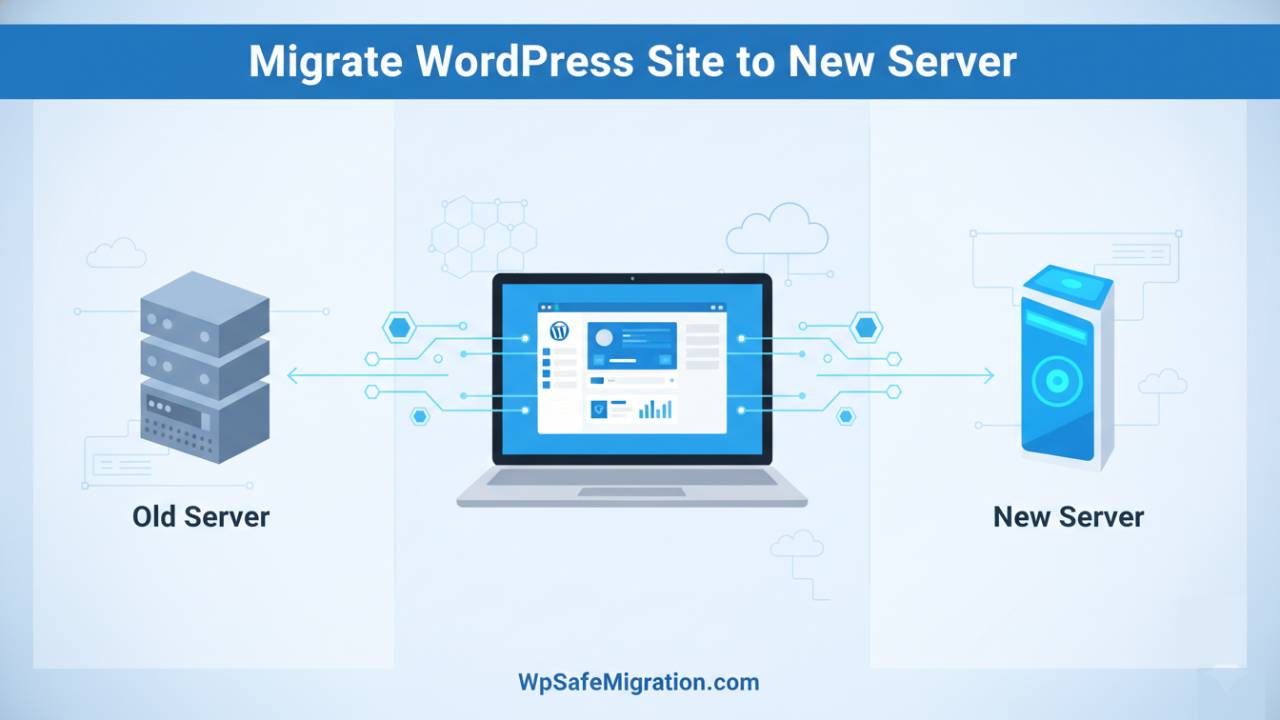
WordPress migration simply means copying your website from one server to another. Think of your website like a house full of furniture and memories. When you move to a new home, you need to pack everything, take it with you, and unpack it so nothing gets lost. In the same way, migrating a WordPress site means moving all parts of your site — files, posts, pictures, and settings — to a new server where it will still work just as it did before, but possibly much better after the move.
Why You Might Need to Move Your WordPress Site
There are several good reasons someone might want to move their WordPress site to a new server. Maybe your site is growing and the current host is too slow to keep up with visitors. Or perhaps you found a hosting company that offers better prices, stronger security, or features that your old host didn’t have. Some people move their site because they are not happy with the support from their current host, or they want to grow their site into something bigger. Whatever the reason, moving can help your site perform better and make it easier for you to manage in the long run.
Pre-Migration Checklist: What You Must Do First
Before you touch any files or change anything on your server, preparation is the most important step. This stage is like packing before a real move — if you skip it, items can get lost or broken.
First, take a full backup of your entire WordPress site. This means saving all your files and the database — the part of your site that holds all your posts, pages, pictures, and settings. You can use plugins like All-in-One WP Migration or UpdraftPlus to make this easier. You can also search for how to backup in your dashboard if you’re not sure where to start.
Next, make a list of everything your site uses — plugins you installed, the theme you are using, and any special settings you made. If some plugins are out of date or not used anymore, now is a good time to remove them before the move. Also, write down all the login details you will need, like your FTP (to access files) and phpMyAdmin (to access the database).
Finally, pick a time when your site gets fewer visitors to do the migration. This helps make sure fewer people are trying to use your site while you are moving it.
How to Backup Your WordPress Site
Backing up is the step that protects you if anything goes wrong. You want two things: your files and your database.
One easy way is to use a migration plugin that can back up and restore your site with a few clicks. These plugins gather everything — posts, pictures, settings, and plugins — into a file that can be moved to the new server later. Popular options include All-in-One WP Migration or Duplicator.
If you don’t want to use a plugin, you can download your files with an FTP tool and download your database from phpMyAdmin. Both of these are usually found in your hosting control panel. Keeping both your files and database safe ensures that you have everything you need for the next steps.
Two Ways to Migrate Your WordPress Site
There are two main paths you can choose when moving your site:
Plugin-Based Method (Easy for Beginners)
This method uses a tool that does most of the work for you. You install the plugin on your current site, export everything into one package, then install WordPress on the new server and import that package. This is great for beginners because it reduces the chance of forgetting something important. Many hosts also offer their own built-in tools that make this even simpler.
Manual Migration (Full Control)
This method is done step by step without a plugin. You first download your WordPress files using FTP. Then you export the database using phpMyAdmin. On the new server, you upload the files and import the database. After that, you edit a small file called wp-config.php so your site knows where its database lives now. This gives you the most control but requires more careful steps.
Setting Up the New Server After You Migrate WordPress Site to New Server
Now that you’ve moved your files and database, it’s time to prepare your new server so your WordPress site can run from it. Think of this step like arranging furniture in your new house before you start living there. Before doing anything else, you need a fresh WordPress install on the new server. Most hosting control panels let you install WordPress with a simple click, but you can also upload a clean WordPress folder manually through FTP if needed. Once WordPress is set up, create a new database and user inside your control panel — this is where all your content and settings will live. Use the same database name and credentials you noted down earlier so your imported content can fit into this space correctly. When that’s done, upload the old files you backed up to the right folder on the new server and import the database using phpMyAdmin or another database tool. Finally, open the wp-config.php file and update the database name, user, and password so your site knows where to find its information on the new server. This simple match-up makes sure WordPress works just like it did before.
Update DNS After You Migrate WordPress Site to New Server
Once your WordPress site is ready on the new server, you have to tell the whole internet where to find it. This is done by changing your DNS settings. DNS stands for “Domain Name System,” and it’s like a phone book that links your domain name (like example.com) with the place (IP address) where your site lives. To update DNS, log in to the place where you bought your domain (your domain registrar) and find the DNS or nameserver settings. Replace the old server’s IP or nameservers with the ones from your new host. After you save the changes, it may take some time — sometimes up to a day or two — before everything around the world knows the site has moved. During this time, some visitors might still see the old version of your site until the change spreads everywhere.
Testing Your WordPress Site After You Migrate WordPress Site to New Server
Before you tell everyone the move is complete, it’s smart to make sure everything is working just the way it should. This is like checking your new home before inviting guests over. You can type your domain into a browser and see if the site loads. Check different pages, click on pictures, and make sure buttons work. Try logging into the dashboard to see if you can edit posts and change settings. If something doesn’t look right — like broken images, missing pieces, or links that go nowhere — it’s usually because a file didn’t move right or a link still points to the old place. Fixing these small issues now means your visitors won’t face problems later.
How to Migrate Without Downtime After You Migrate WordPress Site to New Server
One big worry when moving a site is downtime — times when visitors cannot see your site at all. But with a few smart steps, you can make the move smooth so most people don’t notice anything changed. A good trick is to keep both the old and new servers running at the same time while the DNS updates. That way, even if someone still sees the old place for a short while, they won’t see a broken or missing site. After the DNS fully switches over and no one is being sent to the old server anymore, you can turn off the old site. This makes the transition easier and safer for everyone.
Common Problems After You Migrate WordPress Site to New Server
Even with careful steps, there are some issues that can happen after moving a site. Here are a few common ones and how to fix them:
- Broken links or missing images: Sometimes links still point to the old server. You can use tools or plugins to search and replace the old address with the new one inside the database.
- Database connection errors: If WordPress can’t find the database, check the wp-config.php file again. The database name, user, password, or host might not match what you set up.
- Login problems: If you can’t log in after the move, clear your browser’s cache and try again. Sometimes old saved data gets in the way.
- Slow performance: If your new server is slower than the old one, check your hosting settings or ask your host to help optimize things.
Post-Migration Checklist
After your site is running well on the new server and you have checked everything, there are a few last steps you should do:
- Check that your permalinks (the links to different pages) work and refresh them in Settings → Permalinks if needed.
- Add your new site location to services like Google Search Console so search engines know where your site now lives.
- Look at your site speed and performance to make sure everything is running fast.
Conclusion
Moving a website may sound scary at first, but when you understand each step, it becomes much easier. When you migrate WordPress site to new server, you are simply packing up your website carefully and placing it in a better home. The key is preparation. A full backup, the right setup on the new server, and careful testing will protect your hard work.
Always remember to move slowly and double-check everything. Keep your old server active until you are sure the new one works perfectly. Test your pages, images, and links. Fix small errors before they become big problems. These simple habits can save you stress and protect your visitors’ experience.
If you ever feel unsure, you can review our other helpful guides like migrate WordPress to new server or migrate WordPress website to new host on WpSafeMigration.com to get more detailed step-by-step help.
With patience and proper planning, your website can move safely, run faster, and grow stronger on its new server.
Frequently Asked Questions (FAQ)
1. How long does it take to migrate WordPress site to new server?
It depends on how big your website is. A small blog with fewer images may take 30 minutes to 1 hour. A large website with many posts, images, and plugins can take several hours. DNS changes can also take up to 24–48 hours to fully update around the world.
2. Will I lose my content during migration?
No, you should not lose anything if you take a full backup before starting. Your posts, pages, images, comments, and settings are stored in your files and database. As long as both are properly moved, everything will stay safe.
3. Can I migrate my WordPress site without downtime?
Yes. The best way is to keep your old server active while setting up the new one. Once the new site works perfectly, update your DNS. This way, visitors will still see your website during the switch.
4. Do I need technical skills to move my WordPress site?
Not necessarily. If you use a migration plugin, the process is much easier and beginner-friendly. Manual migration requires more careful steps, but it is still possible if you follow instructions slowly and clearly.
5. What is the safest way to migrate WordPress site to new server?
The safest way is:
- Take a full backup (files + database)
- Test the site on the new server before changing DNS
- Keep the old server active until everything works
Being patient and checking every step reduces mistakes.
6. Will migration affect my SEO rankings?
If done correctly, your SEO should not be harmed. Make sure your domain name stays the same, permalinks work properly, and there are no broken links. After migration, check your site in Google Search Console to ensure everything is indexed correctly.
7. What should I do if my website shows a database connection error?
This usually means the database details in the wp-config.php file are incorrect. Check the database name, username, password, and host. Make sure they match the ones created on your new server.